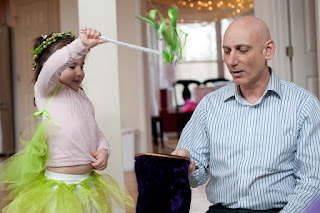
Love Bug turned three this month and we celebrated in Fairy style!
Thank you to pinterest for always having way more ideas than I can cram into one event.
I borrowed heavily from it. So many creative people out there.
Her cake:
This cake (or at least my version looks like this)
This cake looks so much smaller in a picture than it really is.
It was 16 inches tall :)
Fairy food-
We had fairy blossom sandwiches, snail sandwiches, lots of fruit and berries for lunch....not sure how we missed photos of those.
Raspberry lemonade with frozen raspberry cubes.
Fairy games-
We decorated fairy houses. I didn't want to deal with paint at the party, so I painted the houses and let them put stickers on them.
We played musical mushrooms
Went on a fairy treasure hunt
We used some fairy magic in our fairy magic show.
Fairy goodies
All of the fairies were given wings, tutu's and a head garland.
The tutus were made with chiffon ribbon. 6 inches wide. I cut them into 22 inch pieces and then cut a point from the center (3 inches) to 3 inches down the side.
The wings are made from heavy netting. I cut them into 18x22 inch pieces. Each set of wings had 8 pieces of netting. I trimed the outer edge a bit into a wing shape using a rotary cutter. From the top corner in 2 inches to the center (9 inches). Repeat from the bottom corner. I tied them with ribbon in the center. Then I hot glued a flower to each one, and sprayed them heavily with Tulip fabric glitter paint.
The boy fairies also had wings and a crown. The wings were made of a less girly but still sparkly fabric (I didn't pay attention to what type it was, sorry). I made capes out of it by cutting the fabric into 28x18 inch pieces. Fold over one of the short ends by 1.5 inches and sew to make a casing. Put ribbon through it. Cape, done. Then I layed the cape down and folded the short ends into the center and used two safety pins to hold the ends in place, being careful to have the pins go on each side of the casing so the ribbon could still slide.
I pulled the ribbon tight and brought it around and tied a knot. The "wings" could then be tied to the boys. I don't have a picture of them wearing them because neither of the boys put them on. I'll try to make another and get photos of it on here.
Decorations-
I mentioned in a previous post that I came upon a great find after Christmas. I bought all kinds of bright colored, glitter coated Christmas decorations on clearance.
Here's how I put them to use
These were my favorite!
I *just* happened to have a large quantity of organza lying around that I used as the backdrop for the food table and also to hang above the table where the kids ate lunch.
I made a mushroom in the same fashion that I made the chicka chicka boom boom tree (another post).
And the cute sign was made with a clipart I found online and using the font Caribbean Island.
It was a fun party, and especially fun to celebrate my Little Love Bug turning three!
Thank you to my husband and family for all their support, and my husband for taking great photos.


