Monday, February 27, 2012

Fairy Birthday Party

Love Bug turned three this month and we celebrated in Fairy style!
Thank you to pinterest for always having way more ideas than I can cram into one event.
I borrowed heavily from it. So many creative people out there.

Her cake:
I loved this cake and this cake (the house...scroll down). Put them together and what do you get??
This cake (or at least my version looks like this)
This cake looks so much smaller in a picture than it really is.
It was 16 inches tall :)

Fairy food-

We had fairy blossom sandwiches, snail sandwiches, lots of fruit and berries for lunch....not sure how we missed photos of those.


 Raspberry lemonade with frozen raspberry cubes.

Fairy games-

We decorated fairy houses. I didn't want to deal with paint at the party, so I painted the houses and let them put stickers on them.


We played musical mushrooms

 Thistle toss
Went on a fairy treasure hunt

We used some fairy magic in our fairy magic show.


Fairy goodies


All of the fairies were given wings, tutu's and a head garland.
The tutus were made with chiffon ribbon. 6 inches wide. I cut them into 22 inch pieces and then cut a point from the center (3 inches) to 3 inches down the side.
The wings are made from heavy netting. I cut them into 18x22 inch pieces. Each set of wings had 8 pieces of netting. I trimed the outer edge a bit into a wing shape using a rotary cutter. From the top corner in 2 inches to the center (9 inches). Repeat from the bottom corner. I tied them with ribbon in the center. Then I hot glued a flower to each one, and sprayed them heavily with Tulip fabric glitter paint.
 The boy fairies also had wings and a crown. The wings were made of a less girly but still sparkly fabric (I didn't pay attention to what type it was, sorry). I made capes out of it by cutting the fabric into 28x18 inch pieces. Fold over one of the short ends by 1.5 inches and sew to make a casing. Put ribbon through it. Cape, done. Then I layed the cape down and folded the short ends into the center and used two safety pins to hold the ends in place, being careful to have the pins go on each side of the casing so the ribbon could still slide.
I pulled the ribbon tight and brought it around and tied a knot. The "wings" could then be tied to the boys. I don't have a picture of them wearing them because neither of the boys put them on. I'll try to make another and get photos of it on here.
Decorations-

I mentioned in a previous post that I came upon a great find after Christmas. I bought all kinds of bright colored, glitter coated Christmas decorations on clearance.
Here's how I put them to use


 These were my favorite!
I *just* happened to have a large quantity of organza lying around that I used as the backdrop for the food table and also to hang above the table where the kids ate lunch.
I made a mushroom in the same fashion that I made the chicka chicka boom boom tree (another post).


And the cute sign was made with a clipart I found online and using the font Caribbean Island.

 It was a fun party, and especially fun to celebrate my Little Love Bug turning three!
Thank you to my husband and family for all their support, and my husband for taking great photos.

Monday, January 30, 2012

Science Birthday Party- Part 1

Jedi had a birthday last fall but life was crazy and we postponed his party. He FINALLY had his party last weekend.

He's really into science right now, so we decided to go with that theme. I have TONS of pictures so I'm doing this in parts. First up:

INVITATIONS

I used a flask from Silhouette and added extra bubbles. Each invitation had a test tube of "catch a bubbles" included with it.
 The inside
Hind sight- I would have asked for RSVP's sooner, as I needed more time to get things personalized. I needed photos of each child as well as their measurements. I ended up emailing parents and asking for these.

THE LAB
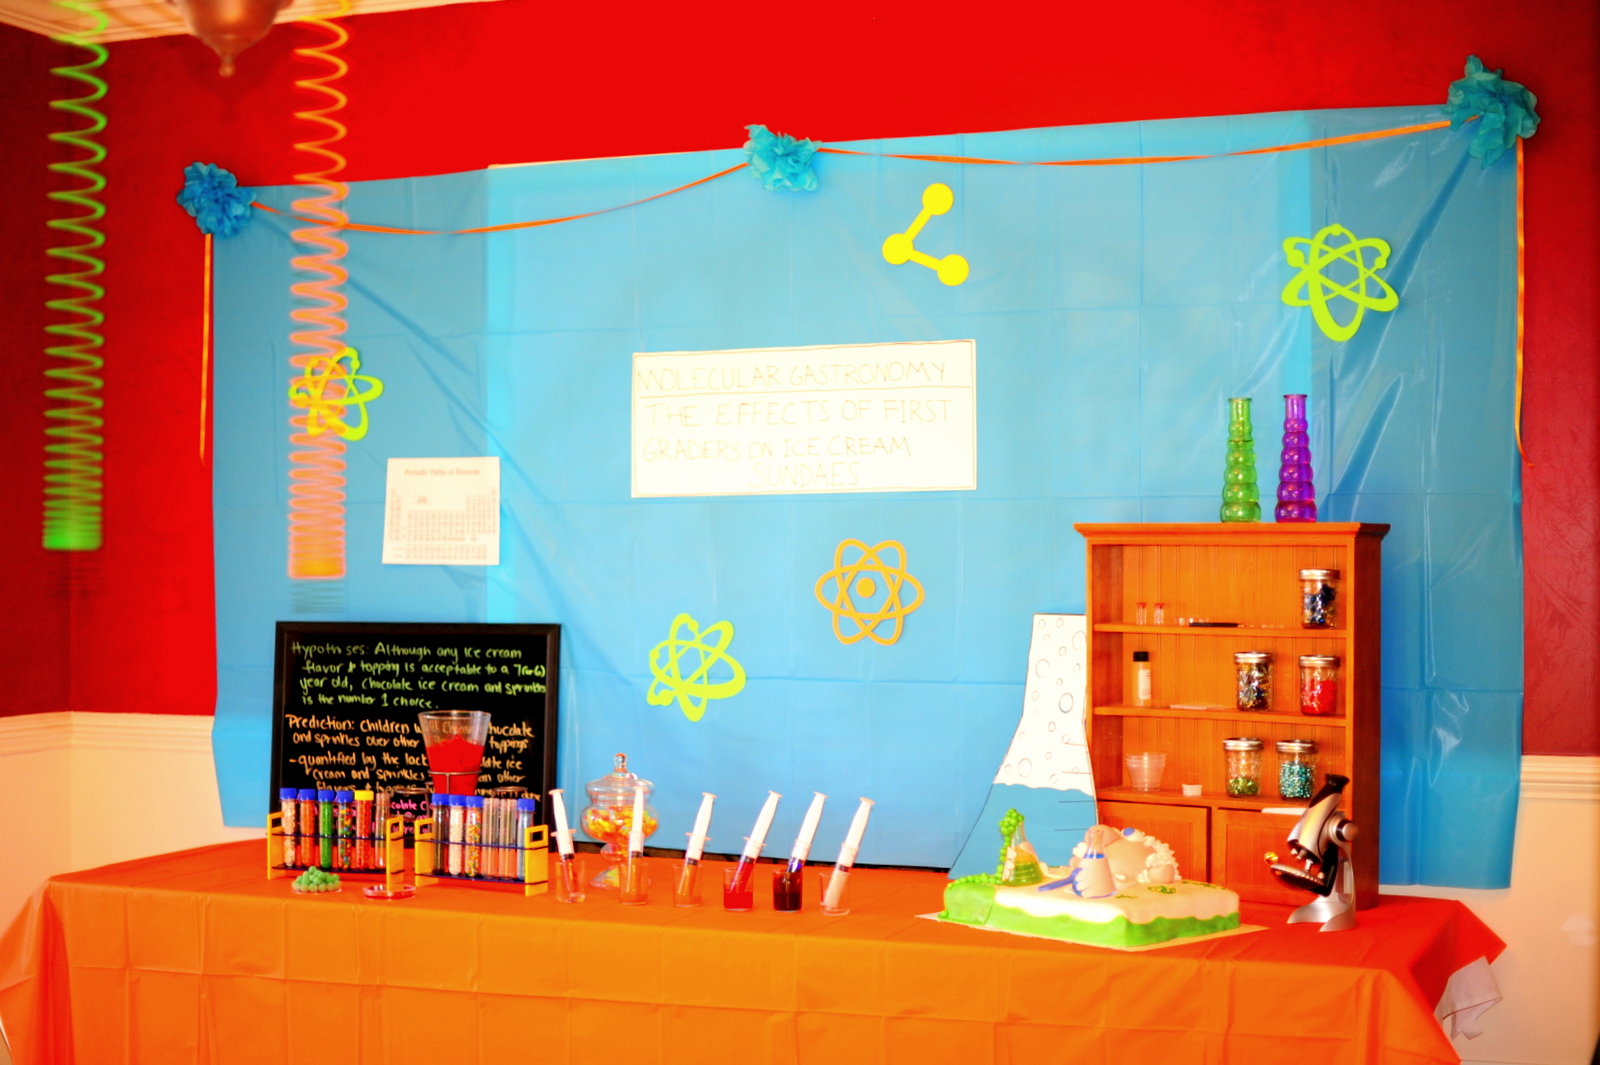
This is the 'Cafeteria and Molecular Gastronomy' area.
Dessert was on this table
and lunch on this one.

I printed signs and put them around the house. It was a really inexpensive way to add a bit of fun.


We had a clean room curtain which was a lightwweight clear plastic table cloth from the Walmart fabric section. It was cut to length -84 inches. I sewed a sleeve across the top to put a tension rod through and cut the plastic in long strips.
 
Lab equipment was set out and ready to use


We had an employee locker room where the scientists could pick up their lab coats, name badges, and mustaches. They left their coats, shoes and gifts in there.


The scientists had to do a thumb print scan to verify their identity. We used a free app for iphone. They loved it! Some of them were even denied entry, and had to rescan.

Everyone who was helping wore scrubs or a lab coat to carry out our theme.
The kitchen was the main lab area, and we had tables set up for the kids to do their experiments on.


THE FOOD

I saw this super cute cake and wanted to do something similar
 The green flask has slime in it and fondant bubbles coming out, the blue flask has blue water and dry ice.

I was suprised at how much I struggled with what food to serve. Part of it was because the kids don't actually know anything about the kind of science we were doing, since they were only 6-7 years old.
I like my party food to go with the theme- and they wouldn't "get it" at all.

I decided to do stuff they would love to eat and then put a science spin on it.

We had Pizza Pi- just pizza with a fun name
 Micro Burgers-
which are made using Rhodes rolls. Defrost dough and divide each piece in two. Roll balls out of dough and place them in a mini muffin tin, pressing them a bit to flatten the bottom. Let them rise and then bake them 350 degrees for 10 minutes, or until lightly browned on top. The "burgers" are premade italian meatballs sliced. I didn't use the ends, only the slices that looked like a burger. Cut sliced cheese down to size, add a slice of cherry tomato and a sliced pickle. YUM. You can add Ketchup or mustard if you'd like to but they were plenty juicy with the pickle and tomato.
Quantum corn dogs
 Molecular melon balls
 Protons and electrons
 Cheesium particles (cheetos)
and Jello Specemins. We made jello and put them in petri dishes. Put them in the fridge for a bit and then add a little bit of food coloring with water to squirt "bateria" into the jello.
 For dessert, we did an ice cream sundae bar. The scientists experimented to create the perfect sundae.

The test tubes had small candy and sprinkles in them
 Syringes filled with Jelly Belly ice cream toppings, caramel, chocolate, and butterscotch.


I made lab coats for each child and embroidered their name on it ("Dr Sarah"). I used mens white dress shirts to make them. I started by asking around to see if anyone had some they were willing to part with. I got 9 that way and then bought the remaining 5 shirts from Goodwill.


To make the lab coats, you cut the sleeves just above the arm button area so they are plain sleeves. Then cut the bottom of the shirt so its straight across. Hem the bottom and the sleeves. I saved the sleeve material to use to make extra pockets on the coats, but never got to them. My sewing machine does embroidary, so that was a snap.

Check out part 2 to see what fun we had at the party!