Wednesday, July 11, 2012

T-shirt to little girl's maxi skirt


I found this t-shirt at Kohl's in the clearance section for $1.44. I HAD to buy it to make a skirt for Love Bug. She's been asking me if I'll make her a "long dress thing...you know, like yours. Not a tutu like mine." WHAT, she wants to wear something that ISN"T a tutu? 

I-can't-believe-it!

Anyway. It was late. Past 9 pm when I started making it. I needed Love Bug so I could make it fit her. I really should have waited until the next day but I was so excited to try it out. Mr. Leafy was not happy that I wasn't putting the crying whining children in bed, so I was working as fast as I could. 

No instructions. I'm sorry. I'll make another. I PROMISE! That one will have a tute. 

Anyway, This is how it turned out. 


Cute, no? 

I mean, for a 10pm finish time and a cranky kid to boot. Not too shabby. I had to piece the waistband together with fabric from the sleeves, but was quite happy to also have some of the blue stripe left over to add to it. 

Love Bug was in heaven wearing it today. 


Dressy ruffled maxi

Found this really cute ruffled knit at Joann Fabric and had to use it for a maxi. It was pretty easy to match up the rows of ruffles. I used the fabric inside out for the waistband. Kind of hard to see in the photo. 
I used the same tute as I did for my other maxi skirts. See the info on THIS POST. 


Maxi skirt/dress

I was trying to talk my oldest teen into making a maxi skirt, and when she told me she wanted a dress instead, I pulled my skirts waistband up to my chest to show her how easy it would be to make one that was a dress. THEN I decided I needed one. But I got to thinking that it would be great if it could be a dress or a skirt. It was made the same as my first maxi skirt. See THIS POST for more info.

So, here is the finished skirt. And...the dress photo...well I accidentally deleted the photo off my FB page and now its gone completely. So I'll have to take another when I wear it next. I spilled some bleach on the bottom of it (and about cried after having *just* made it today) but saved it!! Whew. 


Photo of dress coming soon. 

Meanwhile. I just made the waist band 7 inches before folding so it fit in the chest better. This fabric I used sideways and kept the selvage in tact so I didn't do anything to the hem. Perfect!


The ruffled Maxi Skirt

Bet you thought I was joking about making a maxi for every occasion. No lie, I have a problem. These are so easy and so cute I've made 5 and have fabric ready for several more. PLUS making some for my daughters....I may never stop!

I saw this super cute ruffled maxi from A Small Snippet
She made hers using an old sheet, but that doesn't make any difference in the instructions.

I made mine with a knit lace fabric. Since its totally see-through, I made a permanent slip under it to the knee  with a dark jersey knit fabric. I can not even begin to tell you how comfortable this maxi is. I didn't finish the edges on the ruffles since the fabric won't fray. 

Love love love!!


Sunday, July 1, 2012

Twirly skirt

Another project for our church ladies sewing night is a twirly skirt. Love Bug LOVES to twirl. I love to make her skirts, tutus and the like. 

Found the tutorial on this site  and it was SO easy to make. Seriously easy. My oldest...wait, I don't have a name for her yet....The Great- that's what we'll call her, said she hates it when she reads on a blog that something is super easy and fast. Then it takes all day and never works anyway. Not so here. It literally took me 20 minutes to make. I was fortunate enough to be able to use the exact size that the poster used and no math skills were required. If math had been needed, I would have been crying on the floor in the fetal position after spending hours trying to figure it out. NOT because its too complicated, but because math and I are from different planets. 

Then today I was talking to some friends about the skirt and realized that the math required was actually quite easy and I was just overreacting to begin with. (whew)

Love Bug models her new super cute skirt here:


and the twirl factor is very satisfactory!!


It doesn't require a finished edge because its a knit/spandex fabric, but putting in a small hem would have also been easy. I plan to put some trim on the edge to give it a little pop. I just used my serger on the edge. The waistband is also a yoga pant style. LOVE. LOVE. LOVE.

UPDATE
Loved the twirly so much I decided to make one for myself.


Sorry, no twirling photo :( But believe me, it too has a overwhelming twirl factor. In case twirling is your thing. :)


Maxi Skirt

I love wearing skirts in the summer. Its hot and balmy on the east coast, and skirts *can* be super comfortable. The problem is finding one that fits well. 

This month I get to help plan an activity for our church women's group, and we decided to do a sewing activity with a few projects to choose from. I ran across this really cute Maxi skirt tute on Pinterest (are you really still not on pinterest? please tell me it isn't so)  and decided to give it a try. Leanne- the creator of the super cute maxi in question, talked about how easy it was and how she couldn't help but make more of them. I must admit that I am now addicted to them as well. 
Here is her TUTE- but be prepared to make a dozen of them...you'll want to after the first one.
If you're afraid to work with knit, give it a try anyway. The best advice I can offer is let the machine do the walking. Don't try to pull on the fabric at all, and you'll be fine.

Here is my maxi skirt. I LOVE that the waistband is yoga pant style. I made mine 2 inches smaller than my waist to compensate for the stretchy and I was glad that I did. By the end of the day (read 16 hours including a nap in it) it had relaxed more than expected. I'm sure after a run through the washer and dryer it will shrink back up a bit, but definitely take that into consideration when planning your size.


I'll post more skirts as I make them (hope you don't get board looking at maxi skirts. I'm thinking of making one for every occasion. Can't wait to show you my cakepop making skirt :)


Monday, June 4, 2012

Traveling with a preschooler


Love Bug and I recently took a trip to Disney World with a friend and her daughter.
We flew there and I knew I'd have to keep her happy for our flight. Happily our flight there was a direct flight and we were only on the plane for a few hours. The trip home had a layover (which was delayed) and I was really glad we had a lot packed to do to keep her busy.

Love Bug is the youngest of eight...so after flying with a small fry a time or two I've learned a few things.  
Part of making travel with kids easier, especially young kids, is having lots of little things to do, and having them easy to get to. The other part is having enough to munch on- and keeping your cool.

Currently, you can have one carry-on item and one personal item (purse, small backpack, computer bag, etc) per person on most airlines. I pack a roller bag with my computer, dvd player, extra snacks and activities, a change of clothes for Love Bug (pajamas if it's an evening flight), and any items I need for myself. 
In a backpack, I have snacks, activities, head phones, etc. I put Love Bugs activities in a small bag which I place inside my backpack.  Before we board the plane, I pull the DVD player out of its case, put in the movie that we plan to watch, and put that in my backpack. We make sure anything we need to get to easily is in the backpack. Love Bug carries her own little backpack with some comfort items and a snack or two. Her backpack is really light, and has wheels on it so she isn't over burdened getting on and off the plane. 

When we get on the plane, we pull out the activity bag and put it under the seat in front of Love Bug's seat. We put the snack pack, and drinks in the seat pocket so they are ready to use. We also choose an activity to pull out that won't be a problem while the plane takes off (nothing that will "get away"). 

In preparation for the trips we have planned for the summer, I participated in a travel busy bag exchange. Busy bags are super popular right now...just google or pinterest "busy bags" or "activity bags" and you'll see tons of ideas!

We love busy bags, but I wanted some that were geared specifically for traveling with ease.
This is the bag we used this trip to put our activities in. It fit very well in my back pack and had enough space for lots of compact activities.

 Here is what was inside.
 A small magnetic whiteboard. This doubles as a drawing tool and a place to play with anything magnetic. I included Dry erase pens, erasers, and mini magnets. The board is only a few dollars at Walmart. 

 TIP: the pens that come with anything dry erase are usually not a very good quality and not only have high odor, but also don't erase well. We LOVE Expo dry erase pens. 


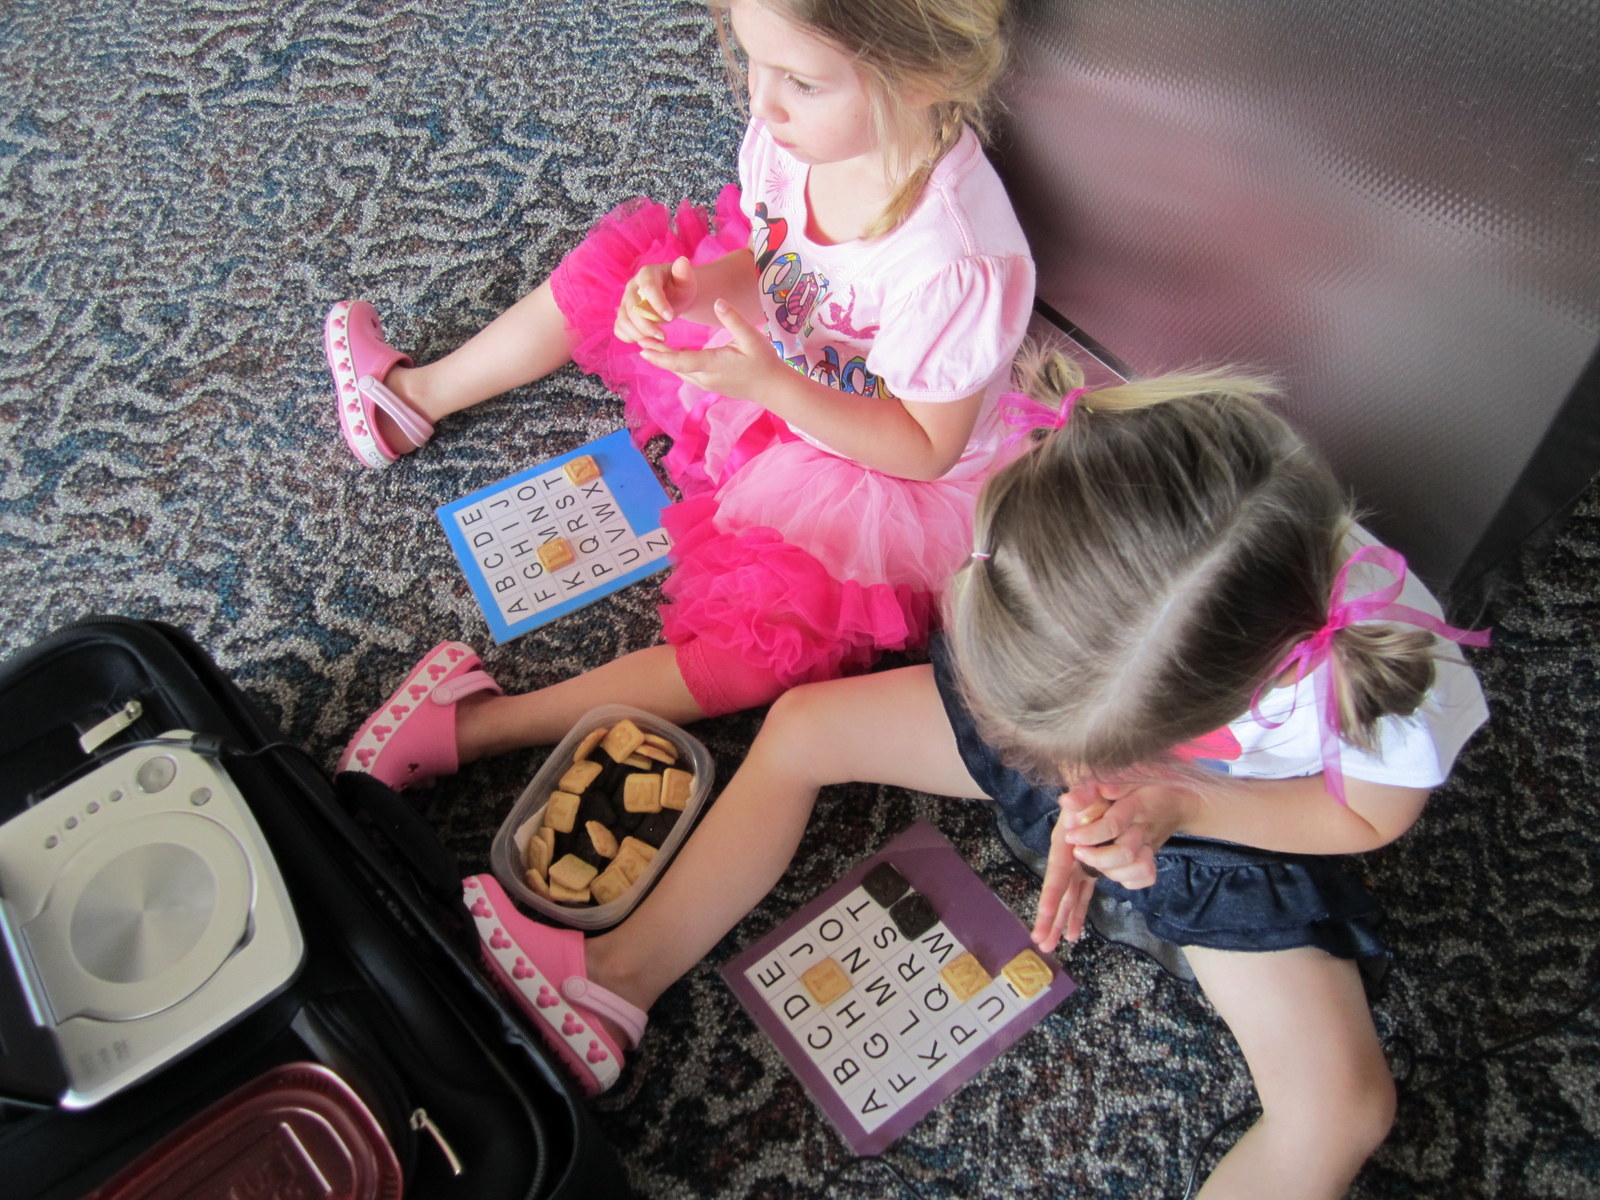
This alphabet board was used with Newman's Own ABC cookies and can also be used with other ABC cookies and crackers- such as Earth's Best Letter of the Day cookies. We printed it from here.
We also had a pouch with pipe cleaners- just for making fun things with and a pouch with Popsicle sticks that have velcro on them-- to make shapes, letters, etc. 
I printed coloring pages and had some crayons in a soap dish. I also made a "Woody's Round-up" game (we're are headed to Disney after all). I used a plastic plate found at the $ zone a Michael's to use as the "pasture",  and drew a fence on it.  I bought cube magnets at Staples and printed a picture of Woody riding Bullseye- which I laminated. Tape it to one cube, use the other on the bottom of the plate to move Woody and herd the white pom pom sheep around. 
More magnet fun. Nemo playset and a Robot Hang man game. Love Bug just played with the letters. 
The pouch on the left has a retractable measuring tape, calculator, water snake game and a few strips of bubble wrap. These are just fun to play with. The right pouch has scissors and paper. Lots of cutting went on!! Bring a ziploc to put the clippings in for easy clean up!
These are a princess memory game and then the green pouch has two collapsible cups, plastic tongs, mini pom poms and a little spoon. I included a paint pallet too. Love Bug poured the pom poms into the center of the paint pallet then used the tongs to move the pom poms around the pallet and into the cups.
Stickers are always a huge hit. We also love the play packs you can find pretty much anywhere now. They come with crayons and a small activity book and are less than a dollar. 
Lacing cards and beads. I printed and laminated Disney themed characters. Love Bug did this activity for a long time. 
Popsicle color matching game. Its made with felt and the sticks. One side has a color dot, the other side has the color spelled out. 

Peter pan and Wendy puzzle from here. I put magnets on the back of each piece to keep them from slipping around. 

In the same pouch were these cute Neverland clip cards from the same website. 
Pom Poms in action.


The sticker books had pages in the center to put the stickers on.


Using the cookie cards during our layover. :)

And our snack pack! We've used this lots of times. Its a simple craft container (like a tackle box) filled with little treats. Love Bug has her own buffet of treats and it makes it easier than having lots of little containers.


On the way up and down in a flight, it helps if your little one is chewing or sucking on something to help their ears with the pressure changes. Love Bug doesn't like drinking a lot- it can sometimes be a while getting up to altitude- and I found that sucking on other things works best. Love Bug enjoys these applesauce packs.


They did the trick and her ears were fine the whole trip.
My friend brought a package of wipes with her and they were something I missed having (now that we are past the diaper phase). So as she pointed out, wipes are great for lots of things. We used them for hands, spills on shirts, wiping off the trays, etc. Bring some diapers wipes along. Travel packs are perfect for that.

Hope your summer is filled with easy travels!!